The Dyson V11 wall mount is a convenient and space-saving way to store and use your Dyson vacuum. With the Dyson V11 wall mount, you’ll be able to easily access and use your vacuum without having to worry about storing it away in a closet or other space.
What You’ll Need
Before you begin, you’ll need to gather a few items. You’ll need a drill, a level, a flathead screwdriver, a Phillips screwdriver, and a mounting bracket. You’ll also need two screws, two wall anchors, and the Dyson V11 wall mount.
Step by Step Instructions
Once you have all of the necessary items, you can begin the installation of your Dyson V11 wall mount. Here are the steps to follow:
- Use a drill to make two pilot holes in the wall where you want to mount the bracket.
- Insert the wall anchors into the pilot holes.
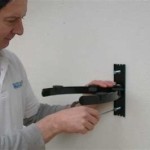
- Place the mounting bracket against the wall and use the level to make sure it is even.
- Secure the mounting bracket to the wall with the screws.
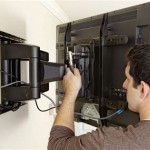
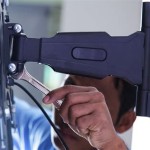
- Attach the Dyson V11 wall mount to the mounting bracket with the Phillips screwdriver.
- Connect the Dyson V11 vacuum to the wall mount.
Additional Tips
When installing the Dyson V11 wall mount, it is important to ensure that the mounting bracket is level. This will ensure that the vacuum will be securely attached to the wall mount. It is also important to make sure that the screws are securely fastened into the wall anchors.
Once the installation is complete, you can enjoy the convenience and space savings of a Dyson V11 wall mount. With the right tools and a little bit of patience, you can easily install your Dyson V11 wall mount and start using it right away.


Related Posts