Wall mounting your cable box is an easy and effective way to free up space in your home. Not only does this make your living space look more organized, but it also allows for easy access to all of your cables and connections. In this article, we’ll discuss the benefits of wall mounting your cable box, the tools and materials you need to get started, and how to properly install your cable box.
Benefits of Wall Mounting Your Cable Box
Wall mounting your cable box offers several benefits, including:
- Frees up floor space
- Makes your living space look more organized
- Allows for easy access to all of your cables and connections
- Eliminates the need for bulky television stands
- Improves your viewing experience
Tools and Materials You Need
Before you can begin wall mounting your cable box, you need to gather the necessary tools and materials. These include:
- Wall mount bracket
- Screwdriver or drill
- Wall anchors
- Measuring tape
- Level
- Cable box
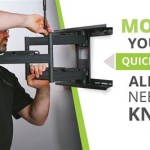
How to Install a Wall Mount
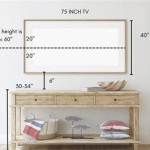
Now that you have gathered the necessary tools and materials, you can begin the installation process. The first step is to locate a suitable spot for the wall mount. Make sure to choose a spot that is within reach of the TV and has access to an electrical outlet. Once you have found the spot, mark it with a pencil. Then, use the measuring tape to measure the height of the spot and mark it with a pencil. Next, you will need to use a drill or a screwdriver to install the wall mount onto the wall. Make sure to use the proper wall anchors for extra stability. Finally, you can attach the cable box to the wall mount and secure it with screws.
Conclusion
Wall mounting your cable box is an easy and effective way to free up space in your home. Not only does this make your living space look more organized, but it also allows for easy access to all of your cables and connections. With the right tools and materials, you can easily install your own wall mount and enjoy the benefits of a clutter-free living space.


Related Posts