If you’ve got a bicycle that’s taking up too much space in your garage or shed, there is a great solution: mounting it on the wall. Not only will it be out of the way and easy to access, but it can also be an attractive addition to any room. Here’s a step-by-step guide for mounting your bike on the wall.
Step 1: Gather the Necessary Supplies
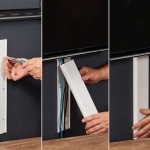
First, you’ll need to gather the necessary supplies for mounting your bike. This includes a bike rack, mounting hardware, and a drill. Make sure that the bike rack is compatible with the weight and size of your bike. You may also want to purchase wall anchors and screws for extra stability.
Step 2: Prepare the Wall
Next, you’ll need to prepare the wall where you plan to mount your bike. Clean the area with a damp cloth to remove any dirt or dust. Then, use a stud finder to locate the studs in the wall. Mark the studs with a pencil. If there are no studs in the area, you can use wall anchors and screws for extra stability.
Step 3: Attach the Bike Rack
Once the wall is prepared, you can attach the bike rack to the wall. Use the mounting hardware to attach the bike rack to the wall. Make sure that the bike rack is securely mounted, as it will be supporting the weight of your bike. You may also want to use wall anchors and screws for extra stability.
Step 4: Hang the Bike
Once the bike rack is in place, you can hang your bike. Make sure that the bike is securely attached to the rack. You may also want to use a cable lock to keep your bike secure.
Step 5: Enjoy!
You’re now ready to enjoy your newly mounted bike! Not only will it be out of the way and easy to access, but it can also be an attractive addition to any room. You can now show off your bike to friends and family, or just enjoy the convenience of having your bike mounted on the wall.


Related Posts