A metal wall mount shelf is a great way to add extra storage space to just about any room. Installing a metal wall mount shelf is a fairly simple task that can be completed in a few steps. Here are some tips on how to install a metal wall mount shelf in your home.
Tools and Materials Needed
To install a metal wall mount shelf, you will need the following materials:
- Metal wall mount shelf
- Screwdriver
- Drill
- Anchor screws
- Stud finder (optional)
Step-by-Step Instructions
Follow these steps to install a metal wall mount shelf in your home:
- Determine the location of the shelf. Use a stud finder (if available) to locate the studs in the wall. Mark the spot where the shelf will be attached.
- Drill holes in the wall where the anchor screws will be inserted. Make sure that the holes are deep enough to accommodate the screws.
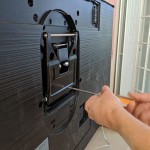
- Insert the anchor screws into the holes and tighten them with a screwdriver.
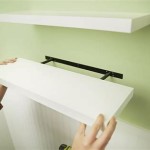
- Attach the metal wall mount shelf to the anchor screws.
- Secure the shelf to the wall with screws. Use a screwdriver to tighten the screws.
Tips and Tricks
Here are some tips and tricks to help you get the most out of your metal wall mount shelf:
- Make sure that the shelf is level before securing it to the wall.
- If the shelf is not level, use shims to adjust the level of the shelf.
- Make sure that the shelf is securely attached to the wall.
- If the shelf is too heavy, use additional anchor screws to support it.
Conclusion
Installing a metal wall mount shelf is a great way to add extra storage space to your home. With the right tools and materials, you can easily install a metal wall mount shelf in a few simple steps. Make sure to follow the instructions carefully and use the tips and tricks provided to get the most out of your shelf.


Related Posts